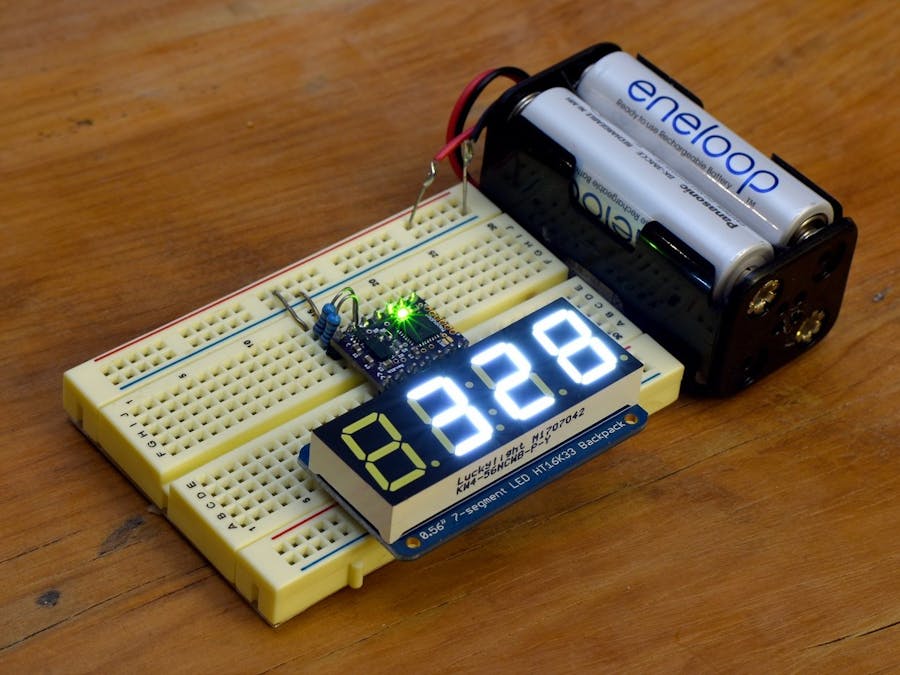
This project will show you how to create a standalone application with the MappyDot Plus working as an I2C master with an I2C 7 segment display. This example can also be adapted for use with a wide range of different client I2C devices for standalone applications.
Also note, we've just released a Kickstarter that packages this badge up into a neat little package with a low power LCD display -
Check it out here - https://www.kickstarter.com/projects/sensordots/the-social-distancing-badge
First you want to put the 7 segment display together. The instructions over at Adafruit cover this really well - https://learn.adafruit.com/adafruit-led-backpack/0-dot-56-seven-segment-backpack. While this project uses the Adafruit I2C 7 segment display, any other I2C based display should work with some minor code modification.
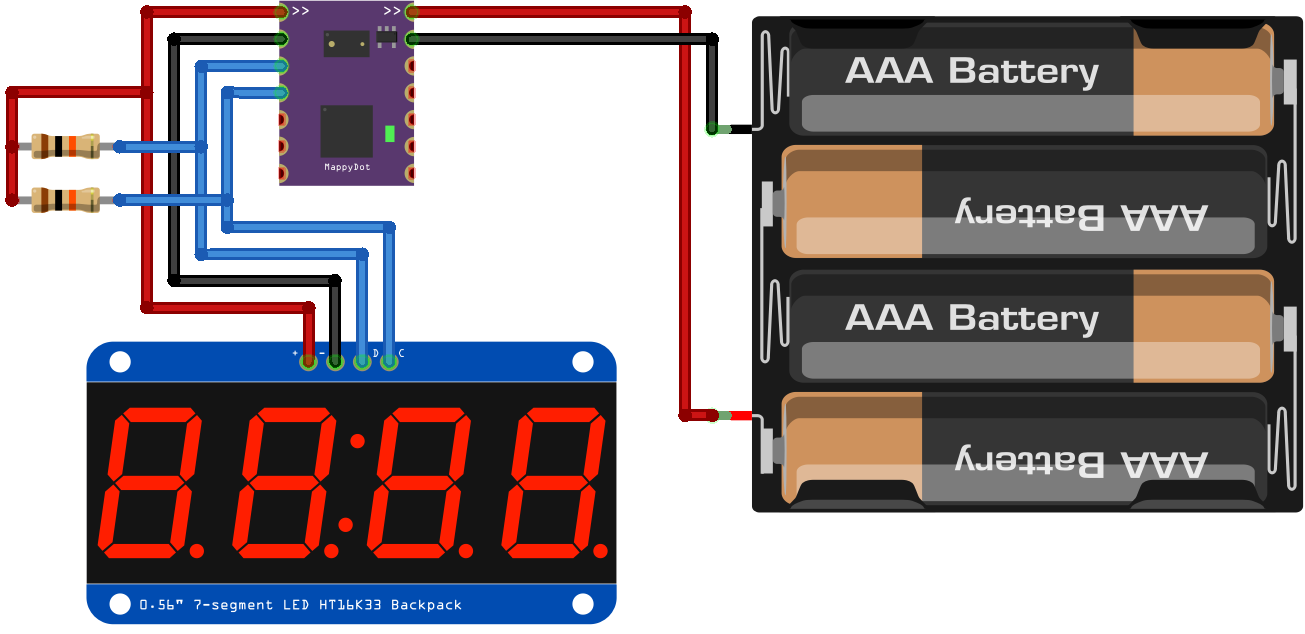
Once you have assembled the 7 segment display, you can now hook everything up as per the schematics below. Provided your battery supply outputs a voltage between 2.8 and 5 volts, you don't need to use a voltage regulator to supply this project. Using 4xAA 1.2v rechargable NiMH batteries is perfect for this setup. If using 1.5V alkaline batteries, you should consider using a voltage regulator (or a diode with a large voltage drop) or opt for only 3xAA alkaline batteries.
ProgrammingNow you are ready to program the MappyDot Plus. The only difference when using the MappyDot Plus in I2C master mode, rather than the normal auto-addressed slave mode, is that during operation you cannot reset the MappyDot Plus to enter the bootloader using the firmware update program. However, you can briefly hold the RST pin low, then run the firmware update program with a target address of 0x07 within 1 second, to initiate the bootloader process. Once the firmware is verified, you can then reset or power cycle the MappyDot Plus.
Details on loading firmware using the update program are located on this page - https://sensordots.org/firmware.
The pre-compiled firmware is located in the GitHub repository (7SegmentFirmware.hex), or you can also download the sources and open them with Atmel Studio to make any custom applications you like.
Once you have got everything working, you can now get creative with a case or frame to hold the parts together.


Comments
Please log in or sign up to comment.